
Stackmon Tips and Tricks: Hidden Controls & Better Routes
Use Stackmon board shortcuts, worker assignments, backpack planning, combat timing, status rules, and recovery tactics discovered across launch walkthroughs.
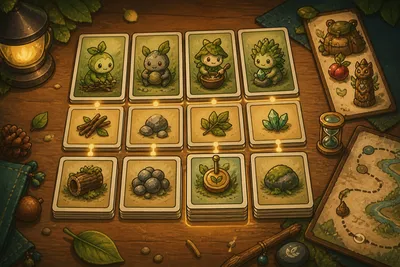
The biggest Stackmon shortcuts are not damage tricks. Pause whenever AP or a capture timer matters, split only the consumable you intend to use, assign several compatible workers to urgent jobs, clear the route-blocking Scout before optional gathering, and keep a second conscious Stackmon when you expect to rely on a Revive Gem.
These tactics were extracted from all eight supplied creator transcripts. Launch-version behaviors are separated from older playtest observations, and exact values or recipes are omitted when the current build has not confirmed them.
Patch note (9.0.78–9.0.87): hold input can now drop more cards from Storage, cards are released above other cards instead of underneath, and Stun got balance adjustments through the launch patches.
Patch 9.0.88 notes (Sep 1)
A few quality-of-life fixes from the September 1 patch worth noting:
- Storage System save/load logic is more reliable.
- How to Make now hides certain recipes to reduce list clutter.
- How to Get now shows all available items for a recipe.
- Task speed updates correctly when workers are added or removed.
- Card stack size raised from 20 to 30.
Hidden Board Controls
Two walkthroughs published with the launch build show the same board-management features:
| Action | Why it matters |
|---|---|
| Sweep matching cards while dragging | Collect a scattered resource type without picking up each card separately |
| Toggle grid placement while dragging | Align production lanes and prevent stacks from drifting into one another |
| Lock a hovered card or stack | Keep mission reserves, buildings, and finished-resource piles from being pushed away |
| Inspect with right-click | Check stats, equipment, recipe relationships, and card details |
| Split one card from a stack | Use one healing item or Stack Totem without moving the full pile |
The launch footage shows Z, X, and the middle mouse button for several of these actions, but bindings can change. Use the current control hint as the authority; the durable lesson is that the actions exist.
Sell the Hint, Keep the Recipe
When an Idea card appears, inspect it and confirm that the recipe has entered the list. Multiple walkthroughs show that the physical Idea card is only a hint after discovery, so it can be sold when money or board space matters.
Also inspect an important resource card. The recipe panel can reveal other recipes that use that material, which is faster and safer than blindly stacking rare ingredients.
Burst an Urgent Task With Multiple Workers
Launch footage shows several compatible workers contributing to one job. Use that deliberately:
- pause when an achievable mission is close to expiring;
- move idle compatible workers onto its missing resource;
- prefer workers whose element or work stats fit the task;
- return them to separate production lanes after the mission completes.
This is most valuable for AP-producing missions and infrastructure bottlenecks. It is less useful when every worker is already maintaining a more important chain.
Organize for Decisions, Not Decoration
Use four stable board areas:
- active production;
- mission and build reserves;
- finished stacks;
- sell pile.
Lock the reserve and building stacks, use grid placement for the lanes, and sweep matching cards into their finished piles. A beautiful board that hides the current mission is worse than a plain board that makes the next decision obvious.
Route Priority: Permanent Progress First
Adventure time drains through the AP bar. Several walkthroughs show the blocking Scout challenge becoming cleared for later visits, while the route card then appears without repeating the same fight.
On a new route:
- pause and locate the blocking Scout or required objective;
- confirm your matchup and healing;
- clear the permanent blocker before optional trees, ponds, or grass;
- gather only what still fits your remaining AP and backpack;
- return early when the next AP segment would buy less value than the loot already secured.
Some obstacles require a learned field skill. Record the obstacle and leave it alone until the Stackpedia, a leader reward, or another in-game clue identifies the required skill.
Pack a Backup if You Carry a Revive Gem
A recurring creator mistake is bringing one fighter plus a Revive Gem. Walkthroughs report that the Gem requires at least one conscious Stackmon during an adventure, so a fainted solo fighter cannot revive itself.
For a dangerous route, pack:
- the primary fighter;
- one healthy backup with useful element coverage;
- healing;
- a Revive Gem if available;
- only as many Stack Totems as the captures you realistically intend to make.
Captured Stackmon return through the camp system, so preserve backpack capacity for tools and loot rather than filling every slot with speculative capture supplies.
Pause Before a Capture or Consumable
After a wild Stackmon falls, its escape timer starts. Pause, inspect the card, split one Stack Totem from its stack, and decide whether the creature solves a real team, work, or collection need.
The same pause discipline prevents a second mistake shown in footage: moving or consuming an entire stack when only one card was intended. Split first, then drag the single card.
Do Not Overwrite Your Own Buff
Launch footage reports that a Stackmon can hold one positive and one negative status at a time. Applying a new status on the same side replaces the previous one.
That means two same-category buffs used together may waste duration. Stagger them:
- apply the first buff before the important exchange;
- use the active skill when its target or timing matters;
- wait for the first status to end or become expendable;
- apply the replacement only then.
Active skills require manual activation and have cooldowns. Passive abilities trigger automatically. Inspect both before deciding whether a Stackmon is a fighter, worker, route specialist, or backup.
Use Both Equipment Slots
Creator walkthroughs repeatedly show two equipment types: a tool and a garment. Inspect the Stackmon to see both slots and remove or swap equipment from that screen.
Do not judge equipment only by its visible stat increase. A lower raw number can still solve the route through an effect, field interaction, or better role fit.
Recover From a Bad Expedition
Launch footage reports that if every active Stackmon faints, the expedition forces a return to camp—but cards already placed in the backpack can still come home. If the last fighter is about to fall:
- pause;
- move the rarest portable finds into the backpack;
- stop spending consumables on a fight you cannot recover;
- heal fainted Stackmon through their linked houses after returning.
This full-wipe recovery detail comes from one launch walkthrough, so verify it before risking a unique item.
Use Night as a Targeted Hunt
Launch footage says night grass can contain different Stackmon and higher-level encounters. Day is the safer progression window; night is a deliberate collection route.
Go at night only when you have:
- a target that actually appears in the alternate pool;
- enough AP to survive a slower fight;
- element coverage and a backup;
- recovery and a free loot slot;
- a willingness to leave when the route turns unfavorable.
Version-Sensitive Tricks Kept Out of the Main Advice
Older playtests also showed manual saving, fast-forward keys, releasing duplicate captures for Essence, exact food ratios, specific evolution levels, building-refuel interactions, backpack upgrade amounts, and biome failure meters. These are useful leads, not safe current rules. Check the current card text or settings before spending rare resources around them.
Related Guides
Evidence Note
Checked 21 August 2026. Board controls, multi-worker tasks, route persistence, status replacement, skill behavior, housing, and night differences appear in launch-version creator footage. Revival, full-wipe recovery, and older playtest-only systems remain labeled as creator-reported where official documentation is absent.