
Stackmon Beginner Guide: How to Start and Capture
New to Stackmon? The first-session route: open packs, work resource cards, earn Adventure Points, prep your backpack, battle, capture and bank them safely.
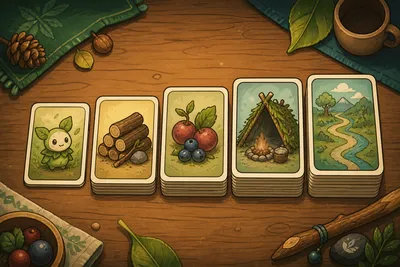
The safest first-session route is simple: open the starter packs, put your Scout or a suitable Stackmon on resource cards, finish Professor Pine’s missions for Adventure Points, pack at least one healthy Stackmon plus recovery and capture items, then explore during the day. Battles run automatically; weaken a wild Stackmon, place a Stack Totem on the unconscious card before its escape timer ends, and bring useful loot home.
This route is assembled from the official game description, current Steam discussions, and eight creator walkthroughs supplied for this guide. Exact recipes shown only in older playtest footage are treated as version-sensitive.
Patch note (9.0.78–9.0.87): the biggest launch-week change is the Depleted State system — buildings with no uses left turn into Depleted versions that can be restored by recipe instead of vanishing (9.0.78). Save stability fixes landed through 9.0.81, and captured Stackas were buffed in 9.0.87. Check the current in-game text because recipes and interactions change fast after launch.
Patch 9.0.88 changes (Sep 1)
The September 1 hotfix touches camp management, card limits, and a few quality-of-life screens:
- Storage System save/load logic was improved — existing storage layouts should survive save/load more reliably.
- Vine Cut can now be used on Lumber Houses.
- Mountate no longer appears incorrectly on Plain Routes Map lists.
- The How to Make list now hides certain recipes to reduce clutter.
- The How to Get screen now displays all available items for a recipe.
- Equipment names now appear correctly in Booster Packs.
- Forger has returned to Island Park.
- Maximum card stack size raised from 20 to 30.
- Task speed updates correctly when the number of assigned workers changes.
- Stackas can no longer be untamed.
Patch 9.0.90 + 9.0.901 (Sep 4–5)
9.0.90 is a content patch, not a tiny hotfix:
- New Soil recipe and Idea Card.
- Soot Rift rewards changed; some rifts take fewer days to spawn.
- Auto-Stack radius increased.
- Gamepad hint on the Backpack for placing cards.
- Game pauses and hides UI while receiving Soot Rift rewards.
- Store/Recipe UI when skipping the tutorial; evolution screen bugs; captured Stackmon negative attributes; wild defeat visuals stuck after capture; Stack PC vs pause menu; School with no Ideas left; recipe status tags; Soot Amulet / Incubator localization; Trainers not getting Equipment effects.
9.0.901 then fixed a Null Reference that stopped some saves from loading. Update before you assume a save is gone.
Patch 9.0.91 (Sep 9)
A small hotfix with two fixes:
- Fixed an error that could occur when loading the Stackpedia.
- Fixed Houses becoming unstacked when loading a save.
Patch 9.0.97 (Sep 18)
The biggest patch since launch week. Three balance and quality-of-life changes, then a long list of card, Adventurer and save fixes.
Balance and quality of life
- Fishing now has an affinity with Water Stackmons — a new type interaction worth building around if you run a fishing route.
- The Essence Machine now costs 2 Essence instead of 1 when upgrading Essences. If you were banking on the old rate, your Essence budget needs to roughly double.
- Equal Recipes from different upgraded buildings now appear only once on Recipe Lists, so the list is shorter and you are no longer reading the same recipe several times.
Card fixes
- Cards becoming unstacked when loading a save, and Soot Rifts duplicating cards, are both fixed — a good reason to reload a save you thought had been corrupted.
- Fixed cards becoming locked behind the map UI, cards colliding incorrectly, Status Effect animations staying on top of cards, and card inspection during Status Effect animations.
- Fixed inspecting a card conflicting with Trainer defeat interactions, and several other errors when selecting or interacting with cards.
- Fixed tasks completing while their cards were despawning, and the Sell button bug in the Store UI.
Adventurers, Soot Rifts and saves
- Fixed Adventurer tasks not starting correctly after loading a save, and Adventurers accepting unconscious Stackmon.
- Fixed money not being brought back after leaving a Soot Rift.
- Fixed Day/Night abilities not triggering when Equipment was equipped during the corresponding period.
- Fixed Last Hope not being removed correctly when loading a save, and unconscious Sootlings being loaded into the game.
- Fixed a controller bug where starting a new game could show the Load button and overwrite the save slot — worth knowing if you play with a pad.
- Game backups are now stored outside the Steam Cloud folder, which should make save handling more robust.
As of October 2, 2026, 9.0.97 (September 18) is still the last numbered patch. That day’s Steam news added Golden, a new Stackmon rarity that can appear in the wild and in card packs.
The Loop in One Minute
- Open a booster pack. It gives you resource, location, item, or Idea cards.
- Work the board. Stack your Scout or a Stackmon on a compatible card and wait for the progress bar.
- Keep mission materials visible. Daily missions are a repeatable source of Adventure Points.
- Pack for one goal. Bring a healthy Stackmon, healing or revival support, and Stack Totems when you plan to capture.
- Explore in daylight first. Creator footage repeatedly warns that night routes can be harder and can contain different or higher-level encounters.
- Win the automatic battle. Elements, attack values, skills, and consumables still affect the result even though attacks resolve automatically.
- Capture before the timer ends. Drop a Stack Totem on the unconscious wild Stackmon.
- Return before you waste the run. Captured Stackmon are sent to camp; backpack space should be reserved for the loot you actually need.
Step 1: Turn the First Packs Into a Working Board
The official Steam page describes the central interaction as dragging and dropping Stackmon, resources, and items onto one another. The creator walkthroughs show the same opening pattern: a Scout and starter Stackmon work trees, berry plants, rock formations, or other location cards while surplus cards are sold to buy another pack.
Do not sell everything. Keep:
- the materials named by the current mission;
- at least one route to healing;
- materials for a Stack Totem when you want another creature;
- rare Idea cards until their recipe is registered;
- enough space to keep the board readable.
Launch-version walkthroughs show four useful board actions: sweep matching cards while dragging, snap cards to a grid, lock important stacks in place, and split one card from a pile. Use them to keep mission reserves visible and avoid dragging an entire consumable stack by mistake. See the full controls and tactics guide; check the current in-game hint because key bindings can change.
Step 2: Treat Missions as Your Exploration Engine
Adventure Points, or AP, pay for travel. Multiple creator walkthroughs show Professor Pine awarding AP coupons or AP through missions. The important planning rule is current even if individual reward values move:
Finish the easy camp mission before you spend a long time reorganizing or crafting.
If the mission asks for a common resource, pause and route all compatible workers toward it. Missing repeated missions delays the part of the game that unlocks new creatures, routes, trainers, and materials.
Step 3: Pack for the Route, Not for Every Possibility
Bring at least one Stackmon; the expedition cannot begin without one. Then add only items that solve your current task:
| Goal | Priority cards |
|---|---|
| First capture | Stack Totem, healing, one healthy Stackmon |
| Resource run | Empty backpack slots, compatible workers, route tool if already known |
| Rival battle | Two Stackmon when possible, element coverage, healing, combat consumables |
| New route | Recovery support and enough AP to finish the route challenge |
Older creator footage shows a Stack Totem Idea using Wood and Stack Gems while a Scout or Stackmon performs the crafting action. Because recipes can change between playtest and release, use the current Idea card as the source of truth.
If you carry a Revive Gem into a dangerous route, bring a backup Stackmon. Multiple walkthroughs report that the Gem needs at least one conscious Stackmon during the expedition, which means a fainted solo fighter cannot revive itself.
Step 4: Explore During the Day Until Your Team Stabilizes
The official game lists distinct biomes with their own mechanics. In creator footage, route packs can reveal tall grass, resources, rivals, ponds, and wild Stackmon. Daytime is the easier learning window. Night can alter the available encounters and their levels.
Do not confuse “day is safer” with “night is bad.” Night becomes useful when you deliberately want its encounter table and have the healing, AP, and element coverage to absorb a failed fight.
On a route you have not cleared, find the blocking Scout before processing every optional resource. Multiple walkthroughs show that clearing the route challenge persists into later visits, so one early fight can save AP on every return trip. Pause before the fight; adventure time does not need to drain while you choose the matchup.
Step 5: Win, Then Capture
Stackmon attacks fill automatically. You still make four decisions:
- which Stackmon enter the fight;
- whether the element matchup is acceptable;
- when to apply healing or another consumable;
- whether the defeated wild card is worth a Stack Totem.
After a wild Stackmon is knocked out, it receives an escape timer. Drop the Stack Totem before that timer finishes. The capture then counts in the Stackpedia and the creature returns to the camp system.
Pause before placing the Totem. Split one card from the stack, inspect whether the catch fills a real role, and leave space for route loot. Captured creatures return through camp rather than occupying the same backpack slot as ordinary portable resources in the shown launch route.
Step 6: Build a House Before Growing Too Fast
Creator walkthroughs consistently show captured creatures waiting at camp until housing is available. A larger roster is not automatically a stronger roster if several Stackmon cannot work, recover, or join the next expedition.
Grow in this order:
- one reliable battle Stackmon;
- one house for the next useful worker or coverage type;
- enough resource production to replace consumables;
- another capture only when it solves a real camp or route problem.
What the Official Sources Confirm
The official Steam page confirms more than 100 Stackmon, 25 or more buildings, 20 or more equipment and item cards, five biomes, camp building, automation, crafting, rival Scouts, Scout Leaders, and the Stackpedia. Steam achievements separately confirm first capture, first structure, first rival, evolution, medals, Soot Rifts, Shiny, Foil, breeding, Stackas, and full collection goals.
Next Decisions
- Gem in hand? Use the Evolution Gem guide.
- Want faster board control and safer routes? Open Stackmon tips and hidden controls.
- Constantly short on wood? Follow the wood and resource route.
- Found a rare-looking card? Compare Shiny, Foil, and Golden before you spend resources. Golden is the new official rarity as of October 2, 2026.
Evidence Note
Checked 2 October 2026. Official features are verified from Steam, including Golden rarity from the October 2, 2026 news. Step order, backup/revival logic, route-challenge priority, board actions, and capture flow are supported by multiple creator walkthroughs; exact recipes, numeric values, and key bindings remain version-sensitive.